Drywall projects often leave behind a fine, powdery mess that clings to every surface in sight. It floats through the air, settles in vents, and turns your freshly finished space into a gritty, gray zone. If you’re wondering how to clean drywall dust without making it worse, you’re not alone. Many people find it’s one of the least enjoyable parts of a renovation. But a clean finish is possible if you take the right steps.
This guide walks you through practical ways to handle the dust left behind after sanding. With the right process and a bit of patience, your space can look great and feel fresh again.
Prep the Area Before You Start
The best cleanup begins before the first speck of dust falls. Taking time to prep your space can reduce how far the dust spreads. Start by covering doorways and vents with plastic sheeting or painter’s tape. Close off rooms that don’t need to be accessed. This limits how much of your home ends up blanketed in dust.
If the room has central air or heating, shut off the system while the work is being done. Dust can travel fast through vents and land in rooms you’ve already cleaned. You can also add inexpensive vent filters for added control.
Cover the floors with rosin paper or plastic drop cloths, especially if you’re dealing with hardwood or tile. These are easier to fold and toss than trying to sweep up the residue later.
Let the Dust Settle First
It’s tempting to start cleaning right after the last pass of the sanding block. But drywall dust floats. If you move too quickly, it just stirs up more debris. Allow 15 to 30 minutes for the dust to settle before you touch anything.
You can open a window if there’s no breeze, but don’t turn on fans unless they’re pulling air out. A box fan pointing out a window helps draw dust outside instead of swirling it around the room.
Once things have settled, start from the top of the room and work your way down.
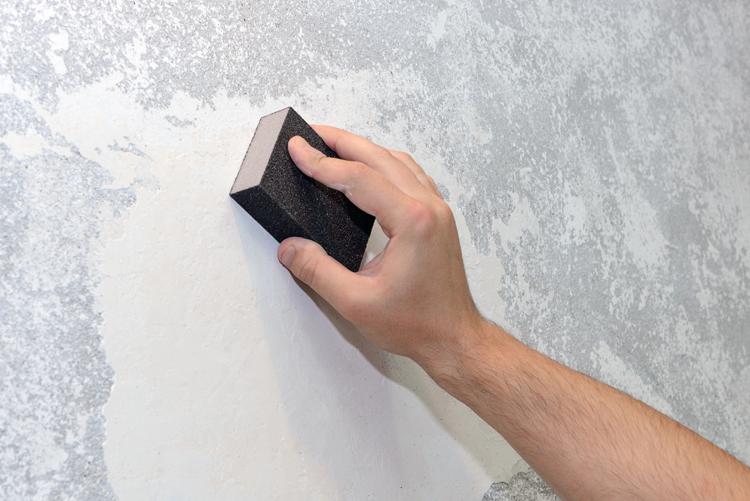
Start With a Dry Dusting Pass
Before you break out water or cleaning sprays, start dry. A dry microfiber cloth or electrostatic duster works well on walls, ceilings, and baseboards. These tools trap the dust rather than spreading it. Avoid regular feather dusters or dry paper towels as they often make things worse.
Use gentle, smooth motions. Pressing too hard can push dust into the paint or finish if the surfaces aren’t sealed. Wipe down all flat surfaces, including windowsills, light switches, and outlets.
A dry microfiber mop is great for taller walls and ceilings. For ceilings with texture, you can lightly shake or tap the mop rather than wipe.
Vacuum Slowly and Thoroughly
Vacuuming drywall dust can be tricky. Regular household vacuums often clog or blow dust back into the room. Use a shop vac with a HEPA filter if possible. These are designed to trap fine particles and prevent them from escaping.
Vacuum floors, baseboards, and the tops of furniture. Don’t forget air returns, window ledges, and under furniture. Move slowly; rushing stirs up the dust and reduces how much gets picked up.
If you’re using a standard vacuum, check the bag or canister frequently. Fine dust can fill it quickly. Swap out the filter if you notice a loss in suction.
Wipe Surfaces with Damp Cloths
Once you’ve gone over all major surfaces with dry methods, you can move on to damp cleaning. Use a slightly damp microfiber cloth and fresh water. Avoid soaking surfaces—too much moisture can damage drywall seams or baseboard edges.
Start with surfaces that get touched the most. Counters, desks, and tables collect a surprising amount of grit. Rinse your clothes often and use fresh water when they start to look cloudy.
For floors, a damp mop is the most effective method. Again, microfiber is ideal because it traps and holds particles. Mop in straight lines, working your way out of the room to avoid stepping over freshly cleaned spots.
If you’ve got carpet, follow up your vacuuming with a once-over using a carpet rake. This helps lift any remaining dust and resets the pile.
Don’t Forget Windows and Fixtures
Drywall dust loves to hide in corners and crevices. Windows are one of its favorite spots. Wipe down both sides of the glass, the sills, and the tracks. Dust can stick inside the little grooves where the window opens and closes.
Light fixtures also attract dust. Turn off the power and use a microfiber cloth to clean the bulbs, covers, and any exposed parts. Ceiling fans should be dusted with care—press too hard and you’ll send dust flying across the room.
Take a look at wall outlets and switch plates. Even those small surfaces can collect a surprising amount of residue during a renovation.
Check the Vents and Filters
After cleaning the room, take a close look at your HVAC system. If it was running during the sanding, there’s a good chance some dust made it into the ducts. Remove and clean vent covers using soap and water. Wipe around the openings as well.
Replace your furnace filter with a fresh one. Even if it looks clean, it may be holding fine dust that can circulate later. If you’re using an air purifier, clean or swap the filter there too.
It’s also worth rechecking your vacuum’s filter. If you did a thorough job, it probably picked up more than you think.
Repeat the Process the Next Day
Even with your best effort, some dust will still be in the air after your first round of cleaning. Come back the next day for a second light clean. Use a dry duster again, followed by another round of vacuuming or mopping.
If you skip this step, that leftover dust can slowly settle and undo your hard work. A quick once-over 24 hours later helps lock in that fresh finish.
Use the Right Tools for a Cleaner Finish
Drywall dust is different from everyday messes. It’s powdery, airborne, and it spreads fast. Regular brooms and cotton rags can’t do the job alone. You need the right tools to catch and trap the dust instead of moving it around. That means using microfiber cloths, vacuum attachments made for fine particles, and HEPA filters that don’t blow dust back into the room.
If you plan to tackle this yourself, make sure you’re not using worn-out cleaning pads. When they’re full, they stop working. Keep extras on hand so you can switch them out when needed. The more often you rinse or replace them, the more effective your cleanup will be.
Pay Attention to Baseboards and Trim
Dust tends to settle along the edges of the room. Baseboards and trim are some of the hardest places to clean after drywall work. These areas collect a dense layer of fine dust that often gets missed on the first pass.
Use a handheld vacuum or a damp microfiber cloth. Move slowly along the edge and wipe in one direction. If the trim is detailed or has grooves, use a small brush or a cotton swab to clean inside the patterns. These small steps make a big difference in the final result.
Check for Residue After Cleaning
Drywall dust has a sneaky way of settling again. Even after two full cleanings, you might notice light patches returning to surfaces. That doesn’t mean you missed a spot. It means more particles have dropped out of the air.
Check your space under natural light. This reveals fine dust that overhead lights might hide. If you see residue on counters or shelving, use a dry cloth first, then go over it with a damp cloth. This quick touch-up helps prevent dust from spreading into other parts of the house when people walk through.
Don’t Skip the Upholstery
If your furniture stayed in the room during sanding, there’s a good chance it’s covered in fine dust. Fabric, cushions, and rugs all hold onto drywall residue. A vacuum with a brush or upholstery attachment works best here. Don’t use a regular lint roller or hand broom. They’ll just push the dust deeper into the fabric.
Lift cushions and clean underneath them. Flip rugs and vacuum both sides. If anything still feels gritty, a light mist of water can help settle the dust so it’s easier to remove. Let items dry fully before using them again.
Empty and Wash Your Tools
Once the room looks clean, take a moment to clean your cleaning supplies. Dump the vacuum canister and wipe it out. Rinse your mop heads and microfiber cloths in warm water. Don’t toss them into the washer until you’ve rinsed off most of the residue. Too much drywall dust in your washing machine can cause build-up and wear down your appliance.
Check your vacuum filters. If you used disposable ones, replace them. If your machine uses washable filters, rinse them until the water runs clear. Let them dry completely before putting them back in place.
Why Professional Cleaning Makes a Difference
Even if you’re good at DIY cleaning, drywall dust is different. It hides in air vents, light fixtures, and places that are easy to overlook. A professional cleaning crew brings experience and equipment that goes beyond standard household tools.
At Denver Cleaning Service Company, we also know how to clean around delicate surfaces and sealed finishes. Our cleaners have worked in homes right after painting, sanding, and major remodeling. We know what techniques are safe and what should be avoided to keep your space looking great.
Plus, we understand how important it is to have a comfortable and clean living area after a long renovation. That’s why many homeowners call us to handle the finishing touches.
Let Us Handle the Dirty Work
Drywall cleanup takes time, patience, and the right approach. It’s easy to miss spots or stir up more mess in the process. At Denver Cleaning Service Company, we deal with post-construction and move-out cleanups all the time. We’ve seen how stubborn drywall dust can be and how frustrating it is for homeowners who’ve just finished a remodel.
We’re a locally based team, and we always send two cleaners to every job. That means we finish faster without cutting corners. Our move-out and post-renovation cleaning services are tailored for homes that need that extra level of care. We work around furniture, protect surfaces, and use tools that are made to handle fine dust.
Ready for a Fresh Start?
Drywall work is messy, but the cleanup doesn’t have to be. If you’re short on time or tired of chasing down fine dust, we’re here to help. At Denver Cleaning Service Company, we bring the tools, the team, and the experience to leave your home clean and comfortable.
Let us handle the mess so you can enjoy your space again. Reach out today for a custom cleaning quote that fits your needs.
Recent Comments